I read an article about the trendiness of using foam in food this morning. What popped out at me was writer Andreas Viestad's shock at hearing comments about making his own whipped cream during a promotional tour a few years' back. He quotes a television host proudly saying, "Did you really whip the cream yourself? Well, my grandmother did that, too!"
As a fellow Scandinavian, I fully understand his amazement at such surprise. I encounter it too: People who speak of bread-making in hushed and reverent tones, as though the skill were some esoteric, magical knowledge bestowed in dark temples by the High Priest of Yeast and the Demiurges of Flour. Or people who are terrified at the thought of cooking a turkey for Thanksgiving, when getting the chance to cook something that big and impressive is so much fun! I can quickly think of a half-dozen items that are easy to make from scratch that many seem to be unable to accomplish without a ready-made product from the store, such as pancakes, biscuits, vinaigrette, marinade, stock, gravy, cookies, etc. Cooking is not rocket science, and yet many seem to approach it with the fear I reserve for trying to do calculus or talking to people on the phone.
Thankfully, I have never been afraid of cooking. Its familiarity to me and the long line of successes that I have had overcome the occasional disaster. But I have other fears and weaknesses. I have messes around the house that I strategically avoid including in the food photographs. I frequently cringe at things I have written. At times, picking up the charcoal and the paintbrush is a real struggle: What am I going to make? Will it be any good? Am I just being stupid to even try? Are my ideas pathetic, weak, derivative, shallow? I get anxious about not being as well organized as I'd like to be or struggling with debt. I feel embarrassed when I haul my heavy body out the door to go for a slow, painful run and imagine how stupid I must look.
In other words, I drag a chain of anxieties, fears, embarrassments, and shames around with me that can make movement difficult, if not downright impossible. I try to rely on little mantras sometimes, like Ted Kennedy's idea of not letting perfection stand in the way of accomplishing something good, or the idea that a long journey starts with a single step, but they don't always work for me.
But here's another idea. I am not afraid of cooking because I am so familiar with it. I have seen it done around me all my life. I have done it myself for years, and I have tried all kinds of things. Know the saying, "Familiarity breeds contempt"? Well, in this circumstance, that's not as bad as it sounds. All that familiarity I have in the kitchen gives me the history to try and fail without too much embarrassment because I know I have succeeded in the past and that I will succeed again soon. All the familiarity and knowledge I have picked up lets me analyze my mistakes and figure out where I went wrong.
So how do I apply this to my fears and anxieties? I breed contempt through practice and familiarity. I try and fail and then I try again. I put embarrassment and fear in a room, and I lock the door. I know they are still there, hooting and hollering away, trying to get out, but I work on ignoring them until they shut up. I drag my floppy belly out the door and run, and I look with empathy at those who run more slowly than I do (and with envy at those who fly by). I make myself write and move on when it's done. I practice drawing, paying little attention to what I draw because I know the ideas will come as I continue to practice. I trick myself into doing the things that scare me or embarrass me or make me feel shame as often as I can with the hope that eventually the shame and fear will go away.
So if you're afraid of cooking, here's what to do. Pick a recipe, any recipe, something you think you might like and try it. Make a mess in the kitchen. If you don't know what something means, look it up. Don't be afraid not to know something and look stupid. The smartest, most talented people in the world got that way because they didn't care if they looked stupid and asked a lot of questions. Maybe your food won't be great the first time, maybe it will. Either way, do it again. Do it until you can do it perfectly and take pride in it. Then try something else and do the same. Build your ability and your familiarity step by step. Know that practice will make you better. And in the meantime, I will try and do the same.
Wednesday, June 29, 2011
Wednesday, June 22, 2011
Once upon a midsummer's night's ribs
Once upon a midsummer night cheery, I thought to myself, "Oh deary,
"I have yet to think of a dinner for,
"The midsummer night's feast that comes a'creeping,
"The luscious fruits of which we must have more,
"The roasted meats upon which we will feast, evermore."
All right, all right, wrong midnight creeping, I know, but I thought it was funny. So I'm easily amused.
Obviously, I wanted to do something with A Midsummer Night's Dream, but it was hard. All that came to mind was some sort of "pork-butt-Bottom the Weaver" kind of joke and a "what the Puck." I couldn't make it all come together. At least not quickly, and I do want to get this post out before Midsummer Night's Eve.
OK, OK, so technically the summer solstice was yesterday, but they won't be celebrating Midsummer Night's Eve in Sweden until this Friday, so I think we're good. This is a story of some amazing pork ribs that I highly recommend grilling for a midsummer night feast or the fourth of July or any other summer-y celebration. Heck, these would be good in winter, and nothing beats tending a grill in wild weather. But here's fair warning: Grilling ribs right takes a lot of time. You want at least three hours on the grill, and more is better. Why? Ribs have a lot of cartilage, which is tough connective tissue. It takes a long time before it melts, but when it does, you have tender, juicy meat heaven. (Apologies to my vegetarian friends; these ribs make me quite the savage.)
First, here are some notes about my grilling setup. I use a Weber kettle grill with charcoal. Lump charcoal, not briquettes (I don't like the way they burn and I believe they leave a chemical aftertaste in the food). So if you have a gas grill, you might want to check out a book on grilling to get more info about how to do this with your equipment. Steve Raichlen's BBQ USA has been a good source for me.
I start by applying a dry rub to a four-pound slab of ribs from Haskins Family Farm (if you know me at all, this is obvious; I like the family, I like their attitude about farming, and I love their products). A dry rub is a blend of salt, sugar, and spices that you rub on meat and leave on for a few hours. This is my blend (and it makes a lot, so that you can either double the amount of ribs or use about half of the rub and set the rest aside for another time):
3/4 cups salt
1 1/2 cups brown sugar
2 Tbsp dried mustard
2 Tbsp paprika
2 Tbsp cumin
2 Tbsp coriander
1 tsp black pepper
This deviates quite a bit from Alton Brown's formula of 8 parts sugar, 3 parts salt, plus 2 parts spices/flavorings, which is a great formula, so if you want to come up with your own blend (and I highly recommend doing so), go ahead and use that.

Lay the ribs out on a baking sheet with some paper towels underneath and rub big handfuls of your blend all over the meat (both sides). Set it aside for at least two hours, but you could probably leave these overnight (if you have a refrigerator that will accommodate. I don't, so I put the pan in a nice cool spot where the dog can't reach the ribs. You don't really have to worry about any bacteria buildup because of the high salt and sugar content of the rub).
Now, while those sit and soak up flavor, make the mop (you can also do this a day or two ahead if you'd like). A mop, in grilling terms, is basically any liquid goodness that you smear on the rubs while they are cooking (others may call it barbecue sauce, but because this is grilling not barbecuing, I try to call it a mop; also, I like the word mop). This mop uses blueberries, but almost any juicy summer fruit will work well (fruit and pork are just so happy together). These are the ingredients:
2 Tbsp olive oil
1 medium to large onion, finely chopped
1 1/2 cup frozen (wild) blueberries (I prefer frozen here because the freezing process breaks down the cell walls and lets the juices flow freely)
3/4 cup light soy sauce
5 garlic cloves, crushed
1/2 cup brown sugar
2 Tbsp ketchup (optional, but it can add to the tang)
3 Tbsp sherry vinegar (you can replace this with cider vinegar or red wine vinegar, but you may want to increase the amount to 4 tablespoons because sherry vinegar is typically very strong)
Heat the oil in a pot and add the onions. Let them caramelize over low heat (takes about 10 minutes). If they burn slightly, it's not a disaster. If they burn a lot, you'd better start over. The bitterness of slightly burnt onions actually adds to the flavor.

Then add the rest of the ingredients and let them simmer over low heat for at least an hour. Don't forget to stir occasionally so it doesn't stick to the bottom. The blueberries will partially fall apart; you can buzz the sauce in a blender if you'd prefer it to be smoother, but I don't usually worry about it. If you are using fruit like cherries, peaches, or anything with some skin, you may want to peel the fruit first or strain out the skins.
About three hours and 40 minutes before you want to eat the ribs, start the grill. It takes about half an hour to get the coals going when you use charcoal. By the way, I finally got myself a chimney starter for the coals, and it's fantastic. It does away with having to use chemicals to start the fire (which may affect the flavor), and it's surprisingly efficient.

When your coals are hot, pile them all on one side of your grill. When you grill food for a long time, you use indirect heat; otherwise you end up burning your food to a crisp, and what a shame that would be. Place the meat on the side of the grill where the coals aren't and close the lid (make sure the vents are open so the fire gets some oxygen). The shape of a kettle grill ensures that the hot air circulates around the meat (it basically works a lot like an oven). You can use wood for smoking as well (I didn't the last time I made these ribs because I find the smoke to be a bit overpowering sometimes). If you do use smoking wood, make sure to soak it in water for at least half an hour before adding it to the coals.
Now, let the fire do most of the work. Every half hour, turn the ribs and mop them with your sauce. Be generous with the mop. Every hour, add about 12 fresh coals to the fire (and smoking wood if you are using it). Just keep doing this for three hours or more. Eventually, the slow heat will dissolve the cartilage in the ribs that can make them so tough. You will also notice that a lot of fat will melt off and the bones will start to poke out. If the bones are turning black, you can wrap them in tin foil. After at least three hours of this treatment, take the ribs off the grill and let them rest for 10 minutes before serving. The ribs will be unbelievably tender and so good you will want to suck every ounce of meat off them.
Serve with potato salad and salad. Or with baked potatoes (you can do these on the grill as well if you like) and sour cream and salad.

"I have yet to think of a dinner for,
"The midsummer night's feast that comes a'creeping,
"The luscious fruits of which we must have more,
"The roasted meats upon which we will feast, evermore."
All right, all right, wrong midnight creeping, I know, but I thought it was funny. So I'm easily amused.
Obviously, I wanted to do something with A Midsummer Night's Dream, but it was hard. All that came to mind was some sort of "pork-butt-Bottom the Weaver" kind of joke and a "what the Puck." I couldn't make it all come together. At least not quickly, and I do want to get this post out before Midsummer Night's Eve.
OK, OK, so technically the summer solstice was yesterday, but they won't be celebrating Midsummer Night's Eve in Sweden until this Friday, so I think we're good. This is a story of some amazing pork ribs that I highly recommend grilling for a midsummer night feast or the fourth of July or any other summer-y celebration. Heck, these would be good in winter, and nothing beats tending a grill in wild weather. But here's fair warning: Grilling ribs right takes a lot of time. You want at least three hours on the grill, and more is better. Why? Ribs have a lot of cartilage, which is tough connective tissue. It takes a long time before it melts, but when it does, you have tender, juicy meat heaven. (Apologies to my vegetarian friends; these ribs make me quite the savage.)
First, here are some notes about my grilling setup. I use a Weber kettle grill with charcoal. Lump charcoal, not briquettes (I don't like the way they burn and I believe they leave a chemical aftertaste in the food). So if you have a gas grill, you might want to check out a book on grilling to get more info about how to do this with your equipment. Steve Raichlen's BBQ USA has been a good source for me.
I start by applying a dry rub to a four-pound slab of ribs from Haskins Family Farm (if you know me at all, this is obvious; I like the family, I like their attitude about farming, and I love their products). A dry rub is a blend of salt, sugar, and spices that you rub on meat and leave on for a few hours. This is my blend (and it makes a lot, so that you can either double the amount of ribs or use about half of the rub and set the rest aside for another time):
3/4 cups salt
1 1/2 cups brown sugar
2 Tbsp dried mustard
2 Tbsp paprika
2 Tbsp cumin
2 Tbsp coriander
1 tsp black pepper
This deviates quite a bit from Alton Brown's formula of 8 parts sugar, 3 parts salt, plus 2 parts spices/flavorings, which is a great formula, so if you want to come up with your own blend (and I highly recommend doing so), go ahead and use that.

Lay the ribs out on a baking sheet with some paper towels underneath and rub big handfuls of your blend all over the meat (both sides). Set it aside for at least two hours, but you could probably leave these overnight (if you have a refrigerator that will accommodate. I don't, so I put the pan in a nice cool spot where the dog can't reach the ribs. You don't really have to worry about any bacteria buildup because of the high salt and sugar content of the rub).
Now, while those sit and soak up flavor, make the mop (you can also do this a day or two ahead if you'd like). A mop, in grilling terms, is basically any liquid goodness that you smear on the rubs while they are cooking (others may call it barbecue sauce, but because this is grilling not barbecuing, I try to call it a mop; also, I like the word mop). This mop uses blueberries, but almost any juicy summer fruit will work well (fruit and pork are just so happy together). These are the ingredients:
2 Tbsp olive oil
1 medium to large onion, finely chopped
1 1/2 cup frozen (wild) blueberries (I prefer frozen here because the freezing process breaks down the cell walls and lets the juices flow freely)
3/4 cup light soy sauce
5 garlic cloves, crushed
1/2 cup brown sugar
2 Tbsp ketchup (optional, but it can add to the tang)
3 Tbsp sherry vinegar (you can replace this with cider vinegar or red wine vinegar, but you may want to increase the amount to 4 tablespoons because sherry vinegar is typically very strong)
Heat the oil in a pot and add the onions. Let them caramelize over low heat (takes about 10 minutes). If they burn slightly, it's not a disaster. If they burn a lot, you'd better start over. The bitterness of slightly burnt onions actually adds to the flavor.

Then add the rest of the ingredients and let them simmer over low heat for at least an hour. Don't forget to stir occasionally so it doesn't stick to the bottom. The blueberries will partially fall apart; you can buzz the sauce in a blender if you'd prefer it to be smoother, but I don't usually worry about it. If you are using fruit like cherries, peaches, or anything with some skin, you may want to peel the fruit first or strain out the skins.
About three hours and 40 minutes before you want to eat the ribs, start the grill. It takes about half an hour to get the coals going when you use charcoal. By the way, I finally got myself a chimney starter for the coals, and it's fantastic. It does away with having to use chemicals to start the fire (which may affect the flavor), and it's surprisingly efficient.

When your coals are hot, pile them all on one side of your grill. When you grill food for a long time, you use indirect heat; otherwise you end up burning your food to a crisp, and what a shame that would be. Place the meat on the side of the grill where the coals aren't and close the lid (make sure the vents are open so the fire gets some oxygen). The shape of a kettle grill ensures that the hot air circulates around the meat (it basically works a lot like an oven). You can use wood for smoking as well (I didn't the last time I made these ribs because I find the smoke to be a bit overpowering sometimes). If you do use smoking wood, make sure to soak it in water for at least half an hour before adding it to the coals.
Now, let the fire do most of the work. Every half hour, turn the ribs and mop them with your sauce. Be generous with the mop. Every hour, add about 12 fresh coals to the fire (and smoking wood if you are using it). Just keep doing this for three hours or more. Eventually, the slow heat will dissolve the cartilage in the ribs that can make them so tough. You will also notice that a lot of fat will melt off and the bones will start to poke out. If the bones are turning black, you can wrap them in tin foil. After at least three hours of this treatment, take the ribs off the grill and let them rest for 10 minutes before serving. The ribs will be unbelievably tender and so good you will want to suck every ounce of meat off them.
 |
| In the immortal words of the Animaniacs, "Helloooo nurse!" |
Serve with potato salad and salad. Or with baked potatoes (you can do these on the grill as well if you like) and sour cream and salad.

Friday, June 17, 2011
Lime-peach upside-down cake: The experiment
So. I did it. You know, the experiment? With the limes and the peaches and the cake and whatnot that I mentioned I wanted to try yesterday? Yeah, I made a lime-peach upside-down cake, and as you will see, the experience had its ups and downs.
So I started with my go-to recipe for all the upside-down cakes I make and then made some modifications.

I zested two limes.

I melted six tablespoons of butter in my cast-iron skillet slowly over low heat.

I added a cup of brown sugar to the butter in the pan.

I juiced the two limes and added the juice to the sugar and butter in the pan.

I added a tablespoon of honey to the sugar, butter, and lime juice in the pan.


Then I let the mixture simmer on low heat until the sauce thickened.

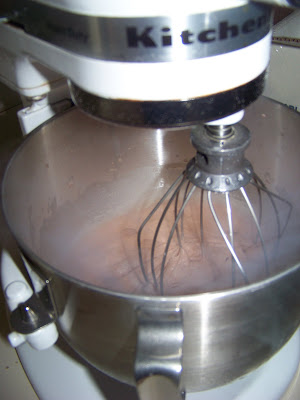
While the lime caramel simmered in the pan, I started on the batter. First I beat six tablespoons of softened butter in my stand mixer until it was creamy.

Then I added a cup of white sugar to the butter and beat that until it was creamy.

I added the lime zest (about one tablespoon) and two eggs to sugar and butter and once again beat it until it was creamy. (It's funny how hard we have to work over our food sometimes. I imagine the molecules with little black eyes. Oh boy. Don't mind me.) Then I added a half teaspoon of vanilla extract. (Usually I scrape the seeds out of half a vanilla bean, but I couldn't find any in the cupboard, which is always overflowing with spices, some of which I don't use because I bought them in the heat of excitement over something or other).

Then I mixed one and a half cups of all-purpose flour, two teaspoons of baking powder, and a quarter teaspoon of salt in a bowl and measured out a half cup of milk. I proceeded to alternate adding milk and flour mixture to eggs, butter, sugar, etc. in the bowl. (About three measures of each and at low speed, otherwise the flour will fly up into a cloud and make you look like an old man, which is of course not a problem if you are an old man, but I am not yet, so I avoid it.)

The next step was to add the peaches to the caramel mixture in the pan. (I used frozen peach slices left from last year--there were about two peaches worth in the bag. The texture of the peaches was pretty mushy, so I would recommend fresh peaches or other fruit.)

I poured the batter on top of the peaches. Poured is generous, more like scraped and smeared. This batter is not runny, and it's not supposed to be. Try to spread it evenly over the fruit and caramel in the pan. (By the way, if you don't have a cast-iron pan, you can do this in an eight-inch cake pan. Just start your caramel in a thick-bottomed pan on the stove and then pour it into your cake pan. However, I think that you should run out and get a cast-iron pan; they are cheap, last forever, and incredibly wonderful to work with if you get a good season on them. Like now. Go. Run. I will wait for you.)
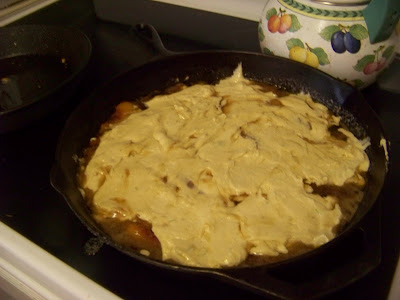
Put the pan into a 350-degree oven and set the timer for one hour and five minutes. Now, if you use eggs that you can trust, gorge yourself on every last morsel of batter that you can scrape out of the bowl. I literally made some kind of grunting Neanderthal noise while trying to shove my face into the bowl (with little success) to get every last molecule of this batter. It's that good. No. Really. Trust me on this.
OK, when the timer went off an hour and a half later I pulled the cake out of the oven (it turned out a little darker than usual, I probably should have pulled it out a little earlier). I placed the whole pan on a rack to rest for 30 minutes. Dum de dum de dum de dum. Twiddling fingers. Pacing.
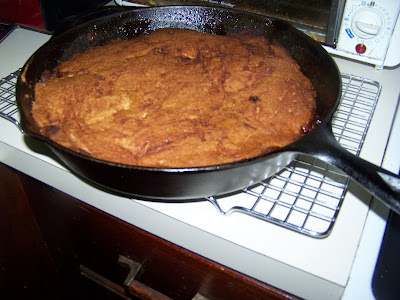
Finally, it was time for the great reveal. I scraped around the edges of the cake with a butter knife to loosen it, and holding a plate on top of the pan, I flipped it over. I pulled up the pan. Nothing on the plate but a couple of crumbs. Hm. OK. Scrape around the edges again. Do the flip thing again, and, don't laugh, the thing comes out in big broken chunks.

Damn! Typical! I have made this cake so many times, and it has come out beautifully every time. The one time I want to show it off to the world, it turns out a big mess. Oh well. It tastes great. I am pretty sure it turned out such a disaster because the fruit was so mushy. If I had used fresh peaches (and perhaps more of them), it would have been beautiful.
Notes on the source recipe: For this recipe I eliminated the cinnamon that is usually added to the flour mixture. I didn't think that lime and cinnamon would be a happy combination. I also added lime juice to the caramel mixture. When I make this recipe with other fruits, I generally follow the recipe as is, minus the almond extract. I like almonds, but I've got a thing about almond extract and other almond-scented stuff. It just gives me the willies. I know, weird, right. Well, everyone has their hangups. I also detest celery and do all I can to avoid it.
So I started with my go-to recipe for all the upside-down cakes I make and then made some modifications.

I zested two limes.

I melted six tablespoons of butter in my cast-iron skillet slowly over low heat.

I added a cup of brown sugar to the butter in the pan.

I juiced the two limes and added the juice to the sugar and butter in the pan.

I added a tablespoon of honey to the sugar, butter, and lime juice in the pan.


Then I let the mixture simmer on low heat until the sauce thickened.

While the lime caramel simmered in the pan, I started on the batter. First I beat six tablespoons of softened butter in my stand mixer until it was creamy.

Then I added a cup of white sugar to the butter and beat that until it was creamy.

I added the lime zest (about one tablespoon) and two eggs to sugar and butter and once again beat it until it was creamy. (It's funny how hard we have to work over our food sometimes. I imagine the molecules with little black eyes. Oh boy. Don't mind me.) Then I added a half teaspoon of vanilla extract. (Usually I scrape the seeds out of half a vanilla bean, but I couldn't find any in the cupboard, which is always overflowing with spices, some of which I don't use because I bought them in the heat of excitement over something or other).

Then I mixed one and a half cups of all-purpose flour, two teaspoons of baking powder, and a quarter teaspoon of salt in a bowl and measured out a half cup of milk. I proceeded to alternate adding milk and flour mixture to eggs, butter, sugar, etc. in the bowl. (About three measures of each and at low speed, otherwise the flour will fly up into a cloud and make you look like an old man, which is of course not a problem if you are an old man, but I am not yet, so I avoid it.)

The next step was to add the peaches to the caramel mixture in the pan. (I used frozen peach slices left from last year--there were about two peaches worth in the bag. The texture of the peaches was pretty mushy, so I would recommend fresh peaches or other fruit.)

I poured the batter on top of the peaches. Poured is generous, more like scraped and smeared. This batter is not runny, and it's not supposed to be. Try to spread it evenly over the fruit and caramel in the pan. (By the way, if you don't have a cast-iron pan, you can do this in an eight-inch cake pan. Just start your caramel in a thick-bottomed pan on the stove and then pour it into your cake pan. However, I think that you should run out and get a cast-iron pan; they are cheap, last forever, and incredibly wonderful to work with if you get a good season on them. Like now. Go. Run. I will wait for you.)

Put the pan into a 350-degree oven and set the timer for one hour and five minutes. Now, if you use eggs that you can trust, gorge yourself on every last morsel of batter that you can scrape out of the bowl. I literally made some kind of grunting Neanderthal noise while trying to shove my face into the bowl (with little success) to get every last molecule of this batter. It's that good. No. Really. Trust me on this.
OK, when the timer went off an hour and a half later I pulled the cake out of the oven (it turned out a little darker than usual, I probably should have pulled it out a little earlier). I placed the whole pan on a rack to rest for 30 minutes. Dum de dum de dum de dum. Twiddling fingers. Pacing.

Finally, it was time for the great reveal. I scraped around the edges of the cake with a butter knife to loosen it, and holding a plate on top of the pan, I flipped it over. I pulled up the pan. Nothing on the plate but a couple of crumbs. Hm. OK. Scrape around the edges again. Do the flip thing again, and, don't laugh, the thing comes out in big broken chunks.

Damn! Typical! I have made this cake so many times, and it has come out beautifully every time. The one time I want to show it off to the world, it turns out a big mess. Oh well. It tastes great. I am pretty sure it turned out such a disaster because the fruit was so mushy. If I had used fresh peaches (and perhaps more of them), it would have been beautiful.
Notes on the source recipe: For this recipe I eliminated the cinnamon that is usually added to the flour mixture. I didn't think that lime and cinnamon would be a happy combination. I also added lime juice to the caramel mixture. When I make this recipe with other fruits, I generally follow the recipe as is, minus the almond extract. I like almonds, but I've got a thing about almond extract and other almond-scented stuff. It just gives me the willies. I know, weird, right. Well, everyone has their hangups. I also detest celery and do all I can to avoid it.
Thursday, June 16, 2011
Food I want to make
I have a huge craving for sweets at the moment, which is a bit weird, I don't usually crave them so ferociously. I am also too exhausted to make anything, and the thought of getting some kind of candy bar or something is actually kind of repugnant (guess I must not be craving sweets that much).
So I was daydreaming about what I might be able to make with what I have. I think I may have some chocolate, but somehow the season doesn't say "chocolate" to me. I've got a bag of organic limes and some frozen peaches left over from last summer (I don't hit the farmers market until Saturday when I will get fruit, fruit, sweet fruit). Because, as I have said, I am too tired to stand in a kitchen and beat butter (I can't even bear the thought of standing by the stand mixer while it beats butter), I am just going to have to hold on until tomorrow, when I am going to try to invent some kind of peach upside-down cake with a lime glaze. I think it will be good. I hope it will be good. Mostly, I think it will be a lot of fun to try. I love making upside-down cakes in my cast iron skillet.
While I was moaning on Facebook about craving lime-y treats, a friend recommended the key lime pie from Joe's Stone Crab (she's a food writer, so she ought to know about all kinds of deliciousness). I looked it up; I could order a pie for nearly $70 (a teeny tiny bit out of my price range) OR I could try this recipe, which I plan to do in the near future. I really want to try inventing my cake first though.
Another food notion that popped into my head was creating the perfect tomato pie. I am not sure what my criteria for perfection are yet, which will of course have an effect on said perfect pie. Obviously, no sog factor in the crust. Ew. The addition of some herbs and cheese would likely be nice, but which ones? Some experimentation may be in order. Also, I love fresh summer tomatoes (I mean who doesn't really?), but I think I want the tomatoes to feel almost dry like a sun-dried tomato. So, once the tomatoes start to hit, I may need to test some variations.
Oh yes, another thing I want to try: Different kinds of pesto. Obviously regular basil pesto is absolutely lovely and freezes nicely, letting you keep that fresh basil flavor all winter or at least as long as the pesto lasts, which may not be that long. But I also want to try making it with cilantro and pepitas. And I have heard that arugula and walnuts can be good. I recently "discovered" arugula and would love to use it more. What else might work? If you have ideas, let me know.
Of course, pasta is something I want to take on at some point. Given how important eating local and minimally processed foods is to me, I have to say I find it a tad embarrassing to buy any food in a box. I mean, it happens, of course, I am only human and I still live in a country with grocery stores, but I do tend to experience a twinge of shame even when I get a box of organic pasta. What I really want to try is this giant noodle. Looks like so much fun! I also want to try coloring pasta with beets, carrots, spinach, and whatever else I can think of because I completely, totally, absolutely adore color.
Generally I think I am a pretty good cook, but I find myself motivated to refine my skills. To pay more attention to nuances and the effects of taste and texture that I am trying to achieve.
Tune in tomorrow (or perhaps Saturday) to find out how the lime-glazed peach upside-down cake turns out.
Oh and to add a little eye candy to this post, here's a little something I drew today. It's after a photo of juvenile red-shouldered hawk. I made some mistakes while drawing it, but it's not too bad. I am trying to work on improving my drawing and painting skills as well.

Oh, and I made mayo today, but with a twist. (We had some leftover grilled chicken and I wanted to make sandwiches.) Instead of using lemon juice in the mayo recipe I use, I substituted lime juice, which turned out really well. I also reduced the oil by a quarter cup, with no discernible ill effects. I think I am going to try to reduce it some more and see how much low I can go.
Monday, June 13, 2011
Connecting farmers and consumers: Two examples of solutions
Food processing and distribution systems are one of the biggest hurdles standing in the way of local food economies. Most of these systems have been optimized for industrial scales and simply don't allow people to access local food in a practical way. Thus, you end up buying asparagus that has been shipped from Chile, even though many local farmers have a glut of it that's fresher and better tasting (and hasn't traveled thousands of miles wasting who knows how much fuel).


Obviously, there's a lot of leg work involved. So you can imagine my excitement when a friend of mine sent me this link today: Farmer Girls.net. The site is designed to provide the critical link between farmer and consumer, which so often hinders people from accessing local food. Websites like these is one more way that local farmers can connect with the buyer and sell their food. Basically the idea is that the consumer orders food from local farmers through the Internet and then picks it up at a certain time from specific locations in the Northern Virginia area. The website provides brief bios of farms and producers that participate, including information about whether they are certified organic, "beyond organic," conventional, or in transition.

Of course, farmer's markets are the most common option (and the most enjoyable, at least for the consumer), but they can take a lot of time out of a farmer's day, can be expensive, and can be hard for people to get to. Also, although I know of a few winter's markets, most farm markets shut down in colder months, so that's several months out of every year when farmers aren't able to sell their wares. (Photos illustrate the goodies I purchased during a recent trip to the farmer's market.)

Another local distribution system that I have followed on Facebook for about a year now is The Local Food Hub, which is based out of Charlottesville, Virginia. This nonprofit works on bridging the divide between producers and consumers that can make eating local food so difficult. According to their website, they focus on three major issues related to local food: distribution, supply, and access.

To address distribution, they have a warehouse where they bring together produce from more than 50 farms, enabling purchasers for big institutions, including hospitals and schools, to purchase local food without having so much difficulty sourcing it.

Aggregating food like this enables farmers to focus more on producing the food, thus addressing supply. The Local Food Hub also provides a lot of educational programs, such as internships and workshops, enabling farmers to continually improve what they do and to bring up a new generation of farmers within the context of the Virginia food shed.

Finally, they provide access with a phone number that enables institutional purchasers to buy the large quantities of food they need and through partnerships that enable the Food Hub to get food to food banks and to needy neighborhoods. It's a cool organization (and I wish there was something like it a little closer to home).
These are just two options for accessing local food, but I hope to learn of more. I'll keep my ears open.
Friday, June 10, 2011
How geeks make ice cream
Mike brought dry ice home from the lab. He does that sometimes. We throw it into bowls of colored water to create lots of smoke, blow up plastic bags, generally mess around. Tonight Mike and Sebastian came home with a plan: They were going to make ice cream.
I was in the kitchen when they came barreling through the door with a cooler of dry ice. Sebastian (four) charged into the kitchen, "Mommy, we are going to do an experiment. We are going to make ice cream!" "Oh," I said. Their plan was to use milk with some peppermint extract. I suggested using the chocolate milk I forgot to drink this week. (We get one bottle of chocolate milk a month from South Mountain Creamery and split it. It tastes just like melted ice cream so I thought it might good to turn into ice cream.)
Out came the blender. Into it went chocolate milk and peppermint extract. On went the blender, and into the mixture went pieces of dry ice. Then came the mess as the combination of dry ice and rotating blade created a mass of foam that went everywhere.

Too much dry ice too quickly. So they had to slow down how fast they were adding it.

First taste, and Mike couldn't stand it. Sebastian, of course, loved it. But it wasn't getting cold fast enough. So Mike tossed in a couple of teaspoons cocoa and many tablespoons sugar and start it going again. It got cold, but it wasn't freezing, which surprised us all.

But it made many big messes, as dry ice went in and created an explosion of bubbles that poured out the top of the blender and over the counter. Finally, resigned to the disaster and hoping for something ice-cream-like before Sebastian's bedtime, I suggested that it might freeze better in the stand mixer. The mixture went into the bowl, and we set it up to go.


We turned the machine up a few notches, but when we had it up too high, bits of dry ice would fly out of the bowl. So we slowed it down and added the rest of the dry ice to the mixture.

Finally, the mixture grew thicker and more solid. The bowl of the machine became extremely cold. We stopped the machine to scrape down the sides, where the mixture had become nearly solid and chunks of dry ice remained. We mixed some more.
And, then, ta-da, ice cream!


We doled it out into three bowls and ate it right then and there. It was awful. Chunks of dry ice were left in the mix (Mike got one in his mouth, which made his teeth feel spongy). The dry ice had created an unpleasant texture like frozen carbonation. The flavor was really weird, dominated by strong peppermint and without a lot of body.
Nonetheless we ate it all, Sebastian with more gusto than Mike or me, but he's into the sweet stuff. It was the worst ice cream I have ever eaten, but probably the most memorable ice cream experience I have ever had.
Lessons learned:
I was in the kitchen when they came barreling through the door with a cooler of dry ice. Sebastian (four) charged into the kitchen, "Mommy, we are going to do an experiment. We are going to make ice cream!" "Oh," I said. Their plan was to use milk with some peppermint extract. I suggested using the chocolate milk I forgot to drink this week. (We get one bottle of chocolate milk a month from South Mountain Creamery and split it. It tastes just like melted ice cream so I thought it might good to turn into ice cream.)
Out came the blender. Into it went chocolate milk and peppermint extract. On went the blender, and into the mixture went pieces of dry ice. Then came the mess as the combination of dry ice and rotating blade created a mass of foam that went everywhere.

Too much dry ice too quickly. So they had to slow down how fast they were adding it.

First taste, and Mike couldn't stand it. Sebastian, of course, loved it. But it wasn't getting cold fast enough. So Mike tossed in a couple of teaspoons cocoa and many tablespoons sugar and start it going again. It got cold, but it wasn't freezing, which surprised us all.

But it made many big messes, as dry ice went in and created an explosion of bubbles that poured out the top of the blender and over the counter. Finally, resigned to the disaster and hoping for something ice-cream-like before Sebastian's bedtime, I suggested that it might freeze better in the stand mixer. The mixture went into the bowl, and we set it up to go.


We turned the machine up a few notches, but when we had it up too high, bits of dry ice would fly out of the bowl. So we slowed it down and added the rest of the dry ice to the mixture.


Finally, the mixture grew thicker and more solid. The bowl of the machine became extremely cold. We stopped the machine to scrape down the sides, where the mixture had become nearly solid and chunks of dry ice remained. We mixed some more.
And, then, ta-da, ice cream!


We doled it out into three bowls and ate it right then and there. It was awful. Chunks of dry ice were left in the mix (Mike got one in his mouth, which made his teeth feel spongy). The dry ice had created an unpleasant texture like frozen carbonation. The flavor was really weird, dominated by strong peppermint and without a lot of body.
Nonetheless we ate it all, Sebastian with more gusto than Mike or me, but he's into the sweet stuff. It was the worst ice cream I have ever eaten, but probably the most memorable ice cream experience I have ever had.
Lessons learned:
- Have a recipe for an ice cream mix.
- Don't use dry ice.
- If you are determined to use dry ice, don't make it in a blender. The narrow space and gas build-up causes the liquid to shoot up out of the blender. Use something with a lot of room for the gas to expand and dissipate, as in the bowl of a stand mixer.
- Don't use dry ice.
Wednesday, June 8, 2011
Sublime strawberries: Two ways to preserve some of that goodness and beauty

I am a little out of practice with writing regularly. You work for years in a regular nine-to-five day job and fully plan to use your evenings wisely with creative pursuits like drawing, painting, and writing. But at the end of the day, you feel drained, barely able to get food on the table, dishes in the dishwasher, and the little guy to bed. Creativity is so far out of your grasp that you plunk down on the couch, throw on the tube, and stew in guilt: "I should be using my time better! If I was really committed, I would find the energy and the willpower." As time passes, your creative muscle starts to deteriorate a bit. To get it back into shape takes persistence and work, just like getting fit after years of mooing on the couch.
So, I haven't written for several days, which I feel guilty about. I have been cooking a lot, but I didn't get any pictures, and the stuff was small, and didn't I already write something about that...? The excuses and the fears pile up, effectively grinding momentum to a halt.

But I must force myself forward, get some writing down, take some photos, break out the charcoal and paper and draw. So, here are some thoughts about strawberries, which have dominated my kitchen for the last two weeks. The ubiquity of the strawberry can make you take it for granted. It shows up as an artificial flavor variety in neon-pink, crazy-quilt plastic packages at the convenience store. It's the little pop of color on top of that decadent chocolate dessert you really shouldn't have fallen for last night. They are available grossly oversized in every season at the grocery store. (That size? Not normal. Can you say octoploid?) So they somehow lose hold over your imagination. You don't get that excited about them.

Or do you? What a shame to let something so sweet and lovely slip into bland ubiquity. Especially when they can perfume a room or draw your eye on a cool spring morning, gleaming ruby red. When I was a kid, my mother never bought strawberries at the grocery store. One time, we were driving in Finland, on our way to visit my grandmother in Kokkola, my mother came to a screaming halt at the side of the road where a couple of people were selling strawberries out of the back of their car. She was so excited. To her this was a gift, a special moment in time. Perhaps the scarcity she lived with as a child (she was born during World War II, and food was hard to come by in Finland) had taught her the value of those sweet red jewels, early gifts of spring. In any case, we had to eat them at once, or they would lose their flavor she said. And so we did. Happily, we selected berry after berry from the box until they were gone. And then they were no more than a memory, but what a sweet and precious one.

It seems important to me to remember the value she placed on those berries every time I visit the farmer's market. Because eating in season is ephemeral; it changes from week to week. This week you are swamped with berries and asparagus, but next week they could be gone. So you grab everything you can, try and set by as much as you can because you don't know what you will find next week. This is both the joy and sometimes the sorrow of the farmer's market. I have many times come back to find the blueberries done for the season and kicking myself for having missed them.

So I have been trying my hardest to make the most of the strawberries by making saft (a Scandinavian fruit syrup you mix with water to make a refreshing drink) and jam. But I haven't made enough yet. My family already drank the saft, and I only got four jars of jam. So I hope there are still berries left at the market tomorrow. Both of the following recipes were adapted from Bonniers Stora Kokbok, which was my second cookbook--a gift from my mother that is completely beaten up. The spine is cracked to pieces, the book is falling apart, but I wouldn't give it up for the world. Part of the reason it is such a mess is because it was soaked through in a rainstorm during a motorcycle trip from Virginia to Colorado. But that may be a story for another day...
Strawberry Saft
Bring 3 deciliters of water to a boil in a big, nonreactive pot. Add 2 quarts of hulled, well-rinsed strawberries to the water (I am especially fond of the berries and fruits from Reid's Orchards. Their grapes look like little glass balls full of sunshine and taste as amazing. Absolutely gorgeous fruit.) Let the mass boil for about 10-15 minutes.
Line a colander with cheesecloth and raise it over a bowl. (I placed two chairs next to each other so that the colander hung down between them about half a foot over the bowl. You can find stands that will enable you to do the same, but the chairs work well.)

Pour the cooked strawberries into the colander and let the juice drip into the bowl for about an hour.
Measure the juice in the bowl. For every quart of juice, measure 6 deciliters of sugar. Bring the juice to boil and add the sugar. Let the sugar dissolve and the mixture cook for about 5 minutes. Skim the liquid. Then add the juice of one lemon (juice of limes will do in a pinch).
Then you can add it to clean, warm bottles and seal it to save for the winter. (We never get that far though; we end up devouring it in about a week.)
To serve, use 1 part saft to 4-5 parts water or seltzer.
Strawberry Jam Scented With Rosemary
2 quarts hulled, well-rinsed strawberries (let them run off for a few minutes on paper towels)
6 deciliters sugar
1 Tbsp dried rosemary
8 black peppercorns
Wrap the rosemary and the peppercorns into a tight little package with cheesecloth (the rosemary and the peppercorns should not be able to escape during cooking).
In a heavy pot, layer sugar and strawberries. Start and end with a layer of sugar. Let the mixture sit for at least an hour, you can go up to 24 hours.
Bring the mass in the pot very slowly to a boil. Let it simmer for an hour, skimming regularly. (Tips for skimming: (1) Get a skimmer, it makes a big difference and doesn't have to cost a lot. (2) Keep a container of cold water next to the pot. Dip the skimmer into the cold water before and after skimming. Replace water as desired.)
Take out the spice bag and discard it. Spoon the jam into warm, clean canning jars and process in a hot water bath for about 15 minutes. (If you've never done any canning before, I would definitely do a little research to learn some more tips and tricks. Because I am still a novice, I don't want to give you the wrong information.)
If, for some reason, your jam doesn't jell, don't despair. It will still make a delicious topping for pancakes (thanks to my friend Walter for the suggestion), or it will be amazing on ice cream. Now go enjoy those strawberries before they are gone!
Update: To make sure your jams and jellies are safe to eat, check the National Center for Home Food Preservation.
Subscribe to:
Posts (Atom)